Filters
4 min read
Autonoedge’s Filter Tools enable administrators to efficiently locate and manage devices based on various criteria such as enrollment status, battery level, package version, and more. This guide explains how to use the available filtering tools to streamline your device management workflow.
Key Benefits #
- Targeted Device Management – Quickly isolate devices based on custom attributes.
- Improved Visibility – Display only the data you need using column customization.
- Efficient Workflows – Apply advanced filtering options for package versions and device metadata.
Step 1 – Access the Filter Menu #
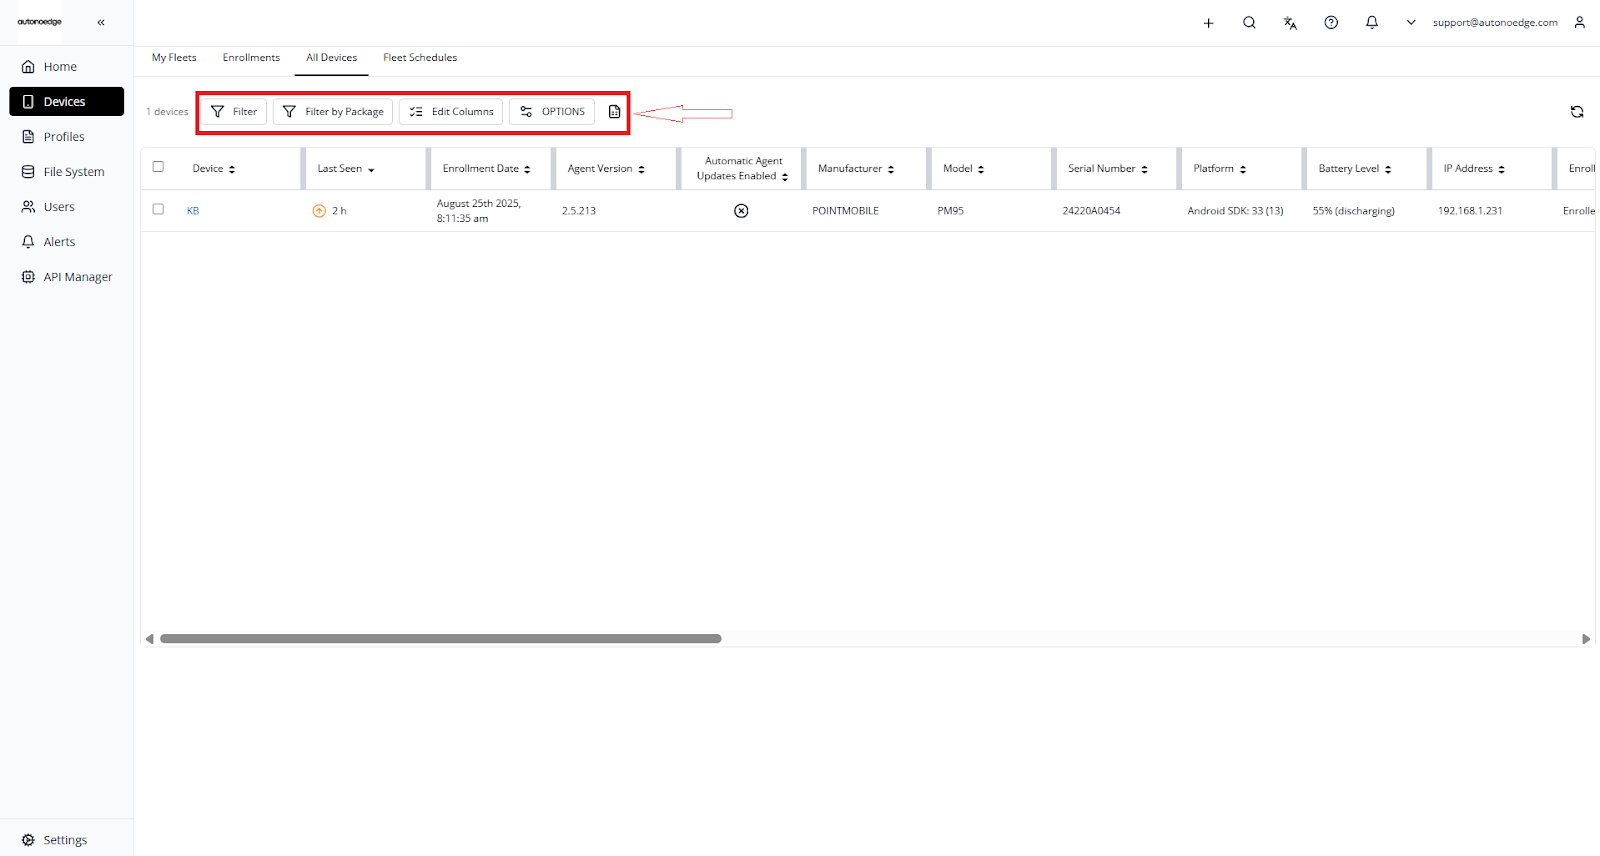
- Log in to your Autonoedge console.
- Navigate to the Device section from the left-hand menu.
- At the top of the page, you’ll find four key filter options:
- Filter
- Filter by Package
- Edit Columns
- Options
- CSV Download
Step 2 – Configure the Filters #
Device Filters #
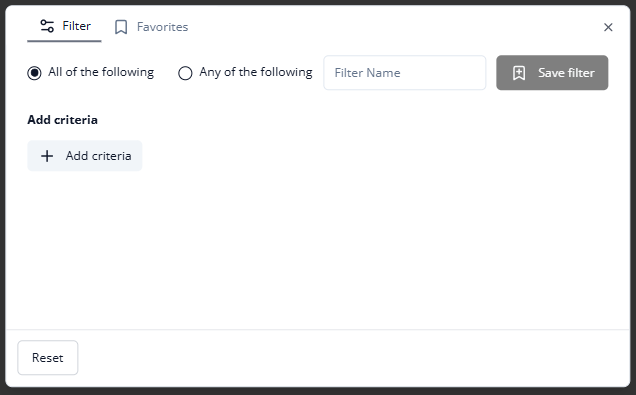
- Click on Filter to create a custom device filter.
- To add criteria press on add criteria button
- To add multiple filters, click “+ Add criteria” again and define each condition individually.
- You can choose between:
- All of the following: Device must meet *every* listed conditions.
- Any of the following: Device must meet *at least one* condition.
Note: This gives you control over how strictly filters are applied.
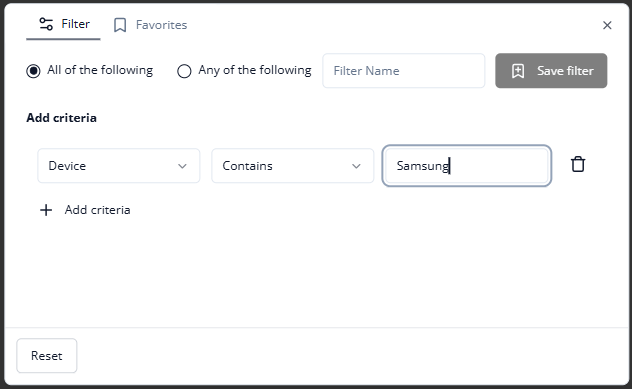
- Use dropdown menus to select fields such as:
- Device Name
- Last Seen
- Enrollment Date
- Agent Version
- Battery Level
- IP Address
- Etc.
- When setting a filter, you can select from several condition types:
- Contains: Matches values that include the input string.
- Does Not Contain: Excludes values that include the input.
- Equal: Exact match.
- Not Equal: Excludes exact matches.
- Begins With: Starts with the given value.
- Ends With: Ends with the specified value.
- Does Not Begin/End With: Excludes those specific patterns.
Setting as Favourites #
Save your frequently used filter conditions for quick access:
- Enter a name in the Filter Name field.
- Click the Save Filter button (purple bookmark icon).
- The saved filter will appear under the Favorites tab for future use.
Filter by Package #
Filter devices based on installed application packages across your tenant:

- Click Filter by Package.
- Enter the Package Name (required).
- Choose the Package Version Type
- By Version Code
- By Package Name Only
- By Version
- Select the condition (e.g. Equals, Contains, etc.)
- Click Save to apply the filter
Note: You can copy a package name by navigating to Device Overview > Application List, then copying the desired entry.
Edit Columns #
Customize your device table view by showing or hiding specific columns:
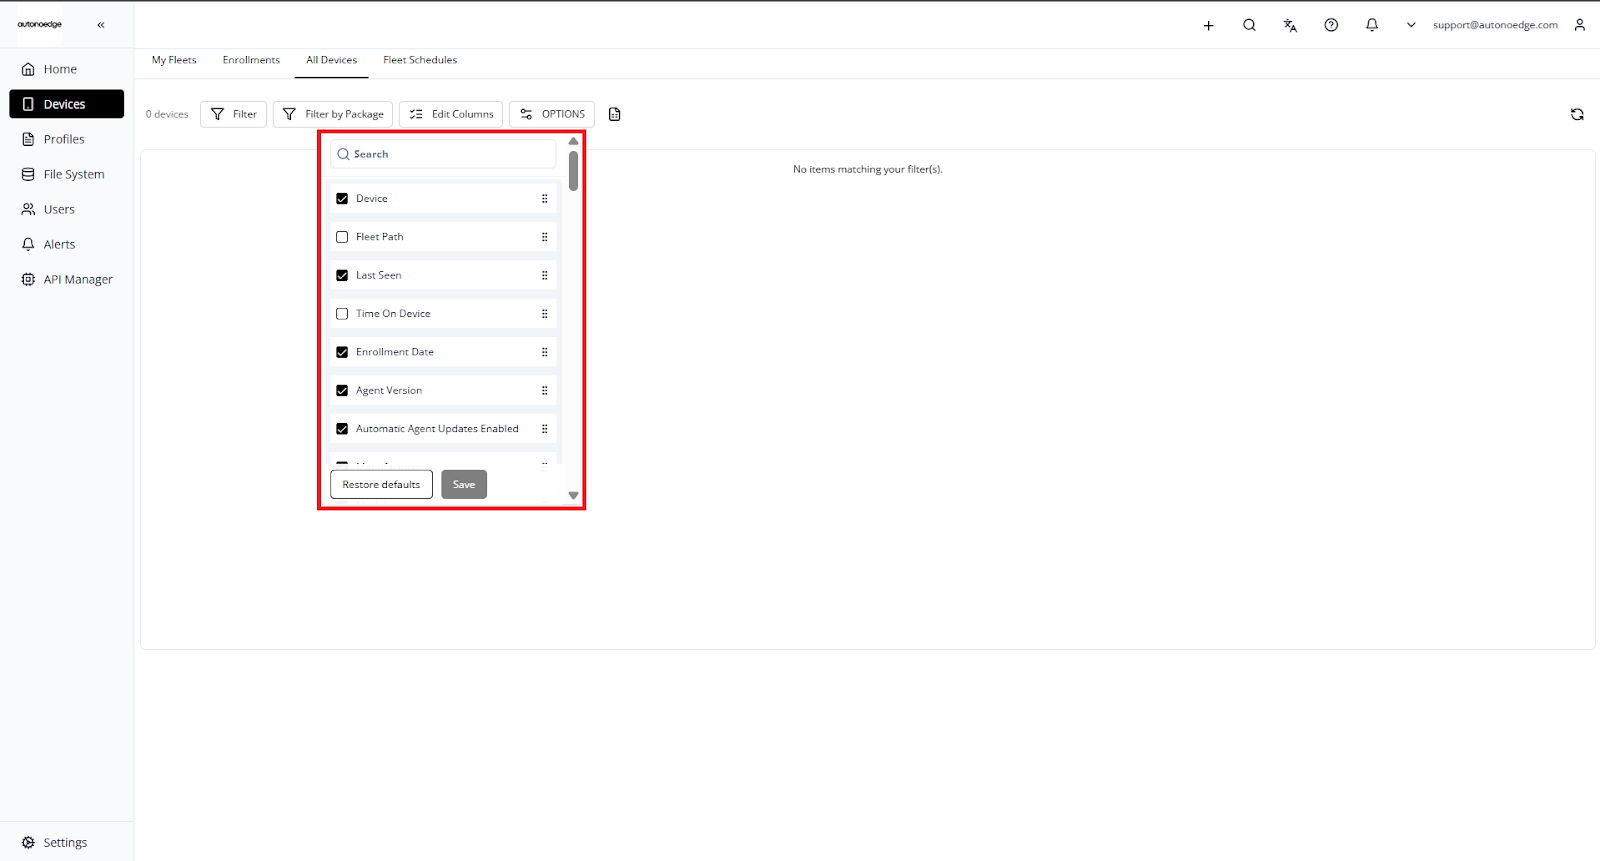
- Click Edit Columns in the toolbar.
- Check or uncheck attributes such as:
- Agent Version
- Manufacturer
- Serial Number
- Battery Level
- Time on Device
- Platform
- Etc.
- Your selected columns will be reflected in the device list view.
Note: You can drag and drop columns to reorder them based on your viewing preference. Your layout changes will be saved automatically.
Options #
To apply the filter to all your devices, you would need to enable Load All Devices before filtering, allowing the filter accurately and efficiently:
- Click Options from the toolbar.
- Toggle Load All Devices ON or OFF, depending on how many devices you want to load at once.
- Click Apply to confirm your changes.
Download CSV #
Export your device list data to a CSV file for offline analysis, reporting, or bulk editing:
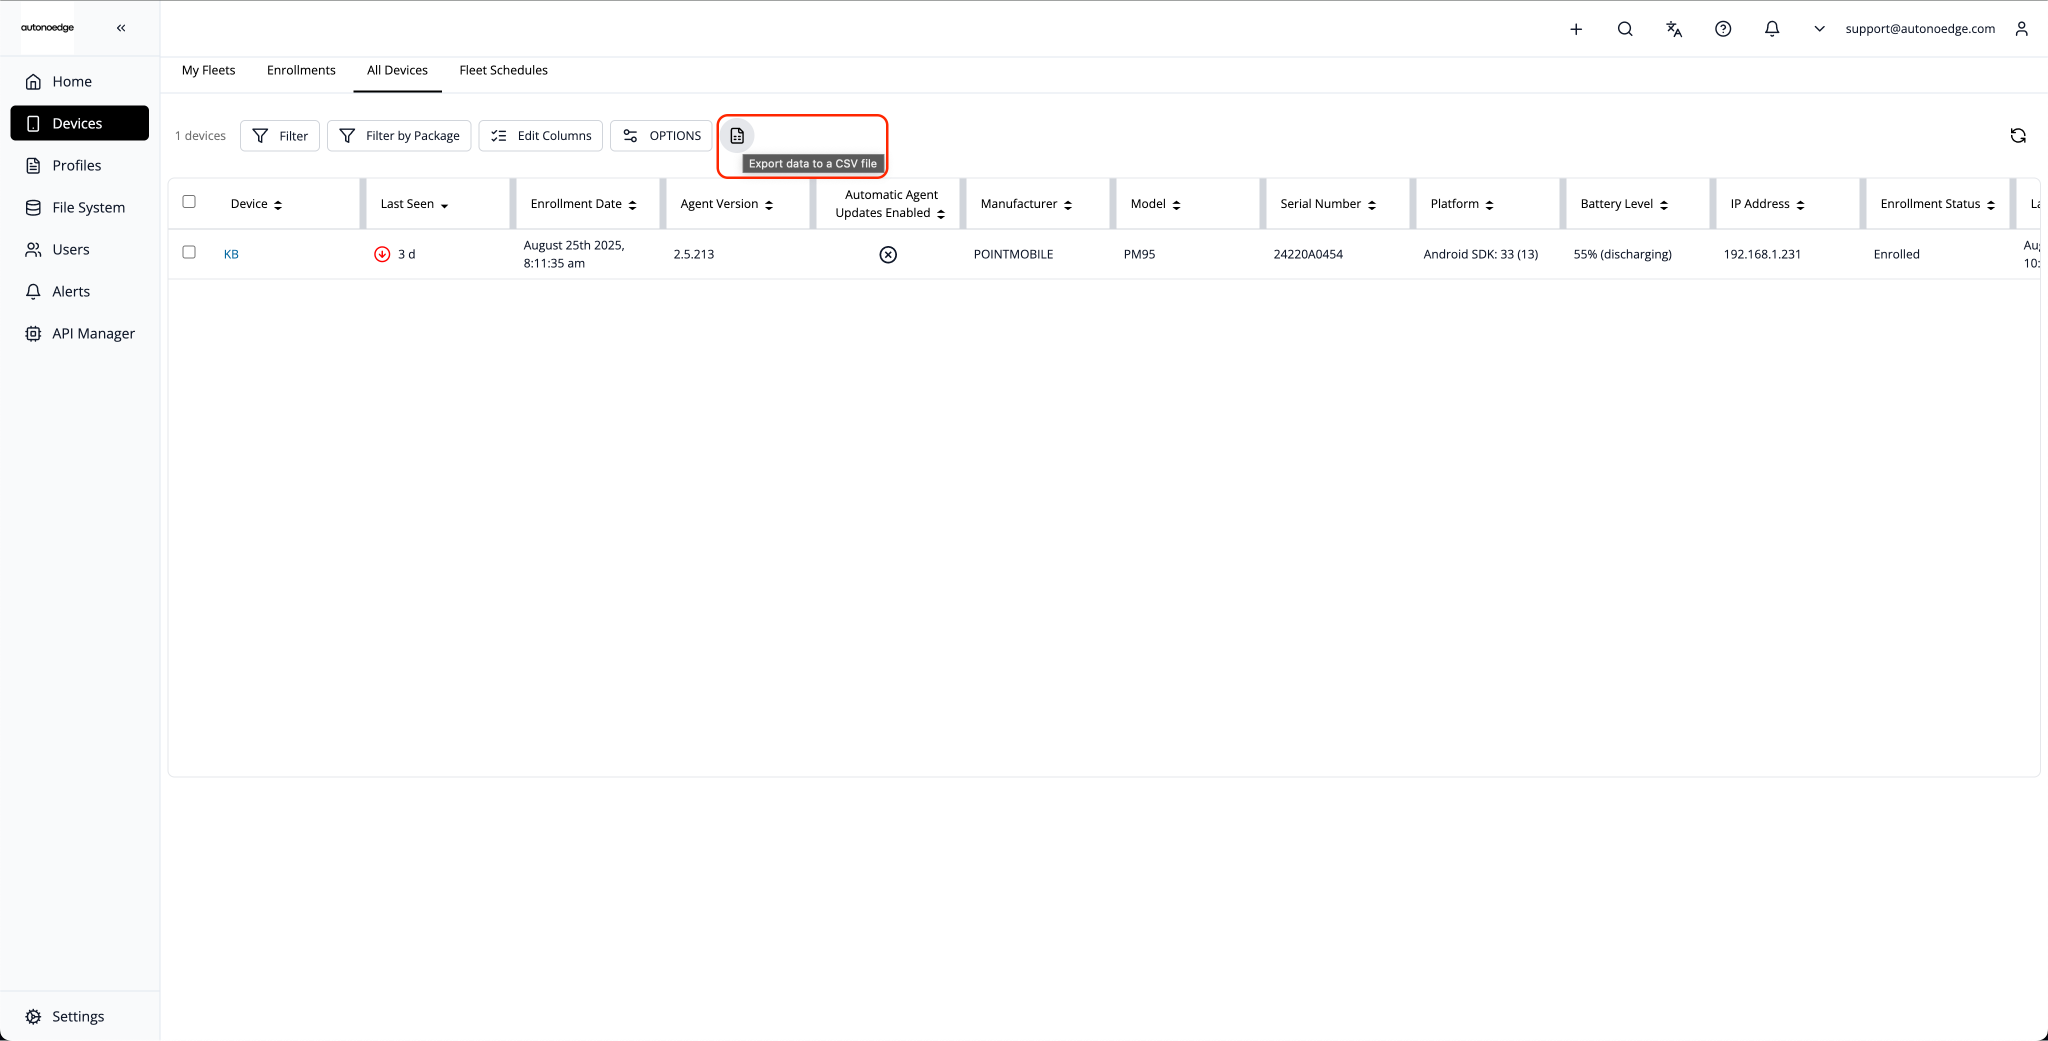
- Click the CSV Download icon from the toolbar.
- The system will generate and download the CSV file containing the currently displayed data in your device table.
Note: The CSV will only include the data that is currently visible in your table view. To include additional columns or filtered results, adjust your view using Edit Columns and Filters before downloading.
Best Practices & Tips #
- Use Targeted Filters First: Apply filters before exporting to ensure your CSV file contains only relevant data.
- Customize Columns for Exports: Use Edit Columns to include only the fields you need in the CSV output.
- Save Frequent Filters: Store commonly used filters as Favorites to quickly apply them in future sessions.
- Use Package Filters for App Audits: When tracking app deployments, use Filter by Package to quickly identify devices with specific apps installed.
- Enable Load All Devices for Complete Results: If you need the full device list in your CSV, toggle Load All Devices ON before exporting.
- Secure Your CSV Files: Treat exported CSV files as sensitive data and store them in a secure location.


